
You made the right choice picking an Xcel Modified. If you are new the class this year we welcome you and offer some advice on five spots that will cause you heartache if you ignore them. The cars themselves are a marvel of engineering and for the most part if you aren’t crashing you should not have a big job preparing week to week.
Still, they do have moving parts and as such require regular maintenance and checks to raise your percentages on laps completed.
Hope here is to shorten the curve and highlight some of the more frequent (or frustrating) trouble spots you need to be aware of.
Here are our 5 things we recommend you put eyes on weekly or every race in no particular order.
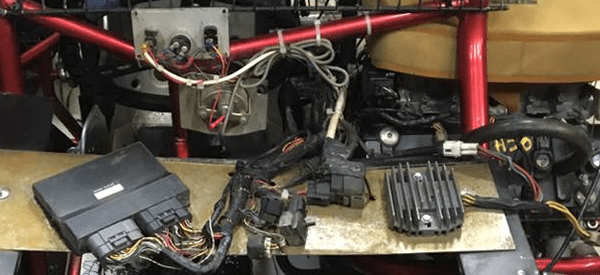
1 Electrical grounding, on/off switch connections
Grounding
An Xcel has ground areas built into three places. One is on the front near the switches, the second is under the fuel safety switch and the third is top mount bar of the fuel cell.
The harness is grounded in the front, motor to the middle and fuel components in the rear.
If you experience any issues with the car running these are the first places to search out and make sure they secure and making proper ground.
Once you have checked your grounds, look for wires that could be grounding out unintentionally. Wires that pass through sheet metal (say for example the transponder wires) may have rubbed the protective outer layer out and be shorting out.
Switch Wire Connections
Those tiny little wires and flat head screws on the switches will be perfectly fine for lap after lap – until they aren’t. It is easy to not include these areas in your checks, but if you are experiencing hiccups or unexpected power losses that little voice should tell you to start looking for loose wires.
Teams should have an electric kit on the ready. Heat shrink connectors and wiring along with fuses and tools for crimping need to be ready at the go so you can fix any suspicious connections and sign off on them as the culprit.
Amazon has inexpensive connectors that heat shrink and solder. We have used these products on our race car, trailer, boat wiring and truck with much success.
It doesn’t hurt to have a small box or drawer in your trailer dedicated to electronics. A test light, some electrical tape and a spare switch could save your race.
Here are a few links to the products mentioned so you won’t have to search all over..
Heat Shrink Connectors | Heat Shrink Fittings | Heat Shrink Tubing | Waterproof Connectors | Sheet Metal Pass Through Connectors
2 Water Penetrations
When you clean your car you should protect your components by covering with plastic and doing all you can to avoid direct spray of water on electronics.
Truth be told factory components are designed to withstand some degree of water just like they would on a motorcycle if you were driving and were caught in a storm, but still protections should be put in place.
If you are power washing your car, make sure you not only cover but prevent those covers from blowing off. It is a great idea to develop a system for protecting the top of the motor, the harness and ECU since you are likely to be back at the same task regularly. Make the effort and then implement it.
One last thing on this subject. Have a method to cover your car in the event of a rain event. Keep a tarp in the trailer to protect your electronics and your driver’s seat. You will be glad you did.
3 Front Suspension: Kingpins and Steering Arm
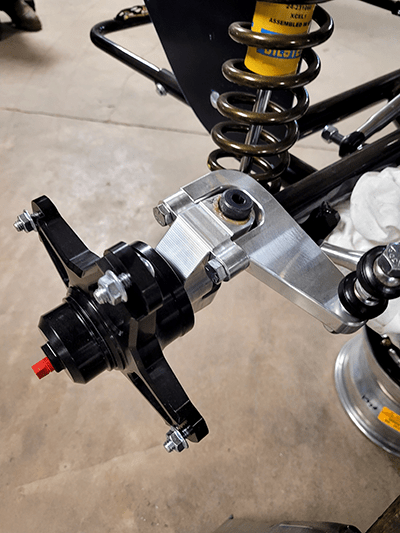
There is some variation to this depending on the style of front components you have
The older style have a retaining clip that we found weren’t actually being used.
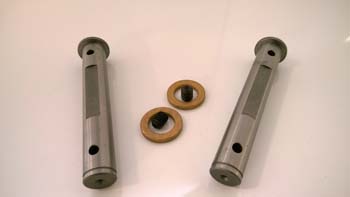
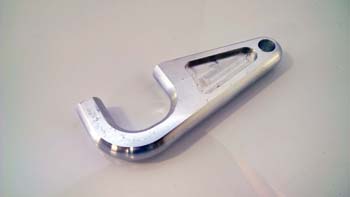
Over time kingpins will work their way out and need to be persuaded back into a seated position. The two bolts on the steering arm can be fusion tight going out and loose coming in.
These arms should not only be checked during your weekly maintenance, but practically every time the car comes back to your pit. While you are looking, check your steering links. Scary going 80mph and the wheel just spontaneously decides to spin.
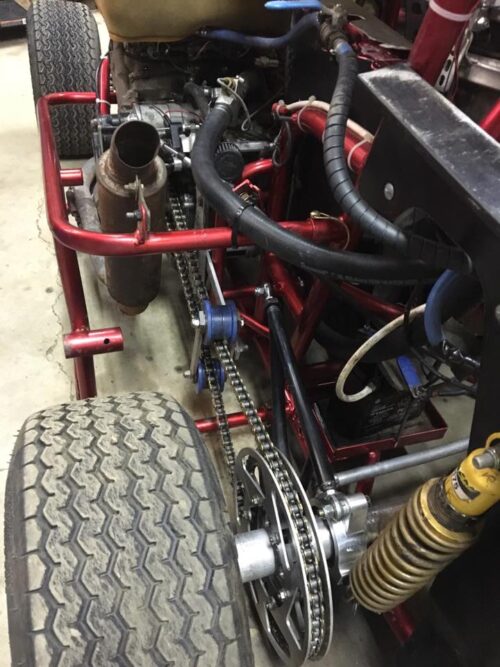
4 Birdcage Connections
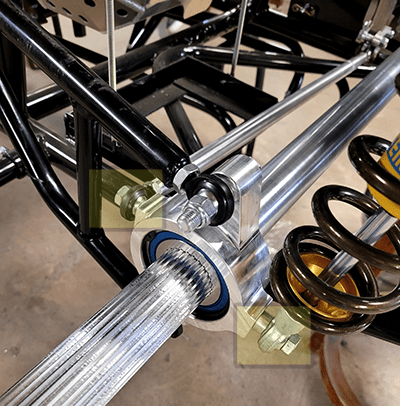
The left side of the car has to spots (Fig. 5 Yellow Highlight) where the panhard bar connects and the rear spring/shock to the suspension via the birdcage. These bolts should be checked and tightened frequently.
The same on the opposing side, but for whatever reason the chain side seems to be more likely to loosen. Teams make adjustments here and it isn’t uncommon to have to replace that panhard bar so thread locking is not always implemented.
A word of advice here: Do make sure the bolt is the correct length. There is not bottom to the threads and a bolt this too long could interfere with the bearings. Cross threading and bolts that are too short should also be a concern and a lot of attention to detail is required here.
5. Proper Chain Tension & Chain Master Links
All of the items listed here can prevent you from finishing and ruin your day, but none as far reaching as having a chain come loose and shred itself in or around your motor, suspension and gearing.
Chains are links and as such it is possible they can bind, stretch and wear out. Unless you are running the same track week in and week out you have to adjust chain lengths for gearing. It is imperative that you have the correct chain tension and are consistent in the way you apply it.
Having the car in different positions can give you a false sense that you have it right and you can be duped into thinking the chain is tight until you realize that rolling the car forward totally changes the tension from what you thought it was.
Xcel Chassis has a video on the YouTube Channel detailing how to properly adjust tension.
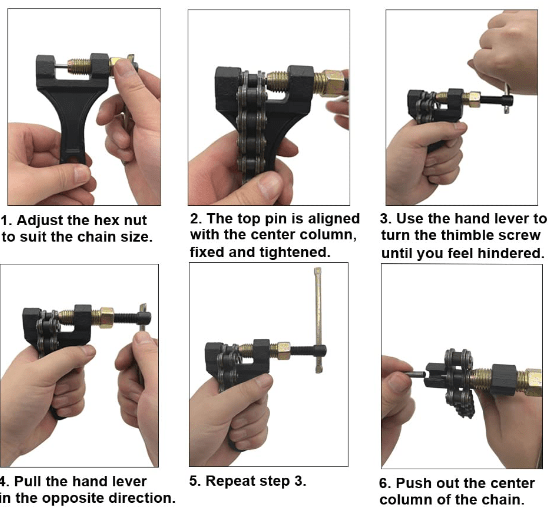
Some teams have done away with master links. A chain link tool is inexpensive. The one in the image is under $15. It will allow you to change chain length as well as make a permanent riveted connection.
Teams make chains to fit the tracks they run and then switch each week to the length for the gearing they want to employ. Properly created chains take away the problem of a master link failure which does happen.
If you do stick with master links, be attentive they direction they are facing when you put the chain on.
Summing up our list and final thoughts.
The list above may be subject to opinion, but many will agree that a setback that could have been avoided is the worst possible thing to a team who has a great car and doesn’t finish the race. The would have, could have, should have make for a real long ride home.
You may be quite honestly the only person who read this article. If not hope is that teams will post what they see as important in the comments at the bottom. I hope other do so.
How far are you willing to go? Thread lock and other measures can be taken. Teams could enclose electronics like a battery in a box if you will (be mindful of heat if you do this) to protect from water exposure.
Are your water/fuel hoses rubbing the outer protections or against sharp body panels?
Replacing every grade bolt on the suspension isn’t a bad idea once a season and the list goes on and on.
The 2023 tour races added up to right around 310 feature laps. That doesn’t take into account practice, qualifying and any weekly races. It is fair to say that you could potentially be running over 500 laps on what is almost certainly a challenging racing surface.
It is easy to imagine that many of these cars have thousands of laps. Statistically speaking something is going to loosen or wear out. It is up to you to catch it.